how to enlarge your partition in netcup VPS
background
I upgraded my VPS from netcup, the server disk grows from 30 gb to 120 gb. And it’s not automatically added to you current using partition. The default disk has now a bigger size, but you need to manually resize your using partition.
to see your current partition with command:
➜  ~ sudo lsblk
NAME   MAJ:MIN RM  SIZE RO TYPE MOUNTPOINTS
sr0     11:0    1 1024M  0 rom
vda    254:0    0  120G  0 disk
├─vda1 254:1    0    2M  0 part
├─vda2 254:2    0    1G  0 part /boot
└─vda3 254:3    0   29G  0 part /
you see the total size of vda is 120G, while the existing partitions only used around 30G. My target is to enlarge the partition vda3 to 120G.
regarding the instructions from netcup, the current manual is not updated and it’s showing a wrong way to start the GParted software. Where in the past you can directly start the GParted software in Media -> DVD Drive, now you need to attach the right DVD to your system and restart the server with the right boot order.
steps to do
the basic idea is to reboot your VPS with the attached DVD inserted software: GParted, then in that software you can change your partition size easily.
- attach the DVD with GParted: go to the
media -> dvd drivesection in netcup scp web-interface, chooseGParted Live CD xxxxxx is version. and clickattach DVD - change the server boot order: check the option
set boot mode to DVD?in previous step, you can also go to thesettingspanel on the left menu and change the boot order there, just make sure the order insettings -> Boot Orderis now withDVD-Romat first - restart the server: go to
controlon the left menu and clickPowercycle - wait a moment for the GParted software to start and go to the
Screenon the left menu - set up keyboard and language configurations. Now you have the web-interface to the server and if it’s started with the DVD, now it should show an old fashioned page to let you select your keyboard and language configurations. Just read the instruction and choose your preferences.
- use GParted to resize your partition: in the GUI now you can see your current partitions
- if it’s stuck trying to search for the partition, but showing you below a notification about found extra storage bla bla and you should optimize it bla bla, just click optimize or yes, and then your partitions will show up.
- choose and click your partition, for example here
dev/vda2, and clickpartitionon the top menu, then clickResize/Move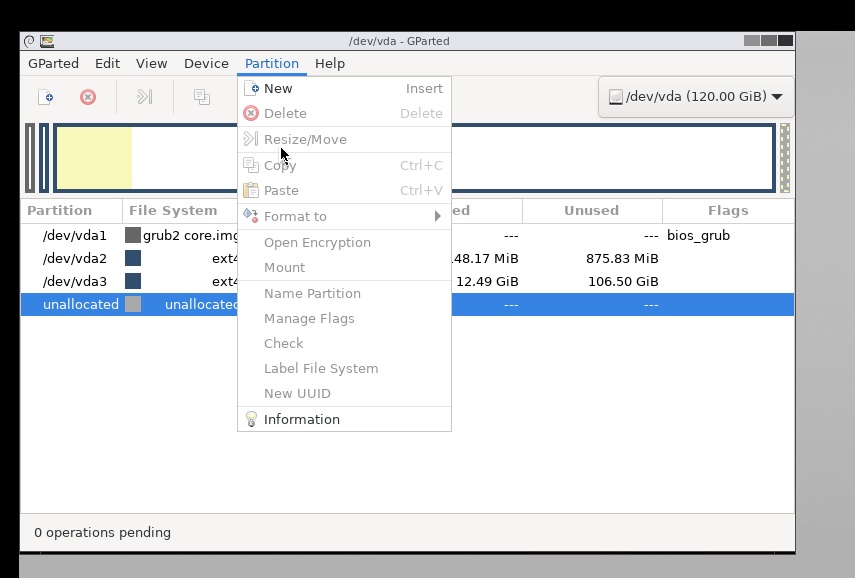
- now you can edit your storage with clear numbers: just enter your wished number into the new size sections and click the
Resize/Movebutton, confirm one more time and you are done.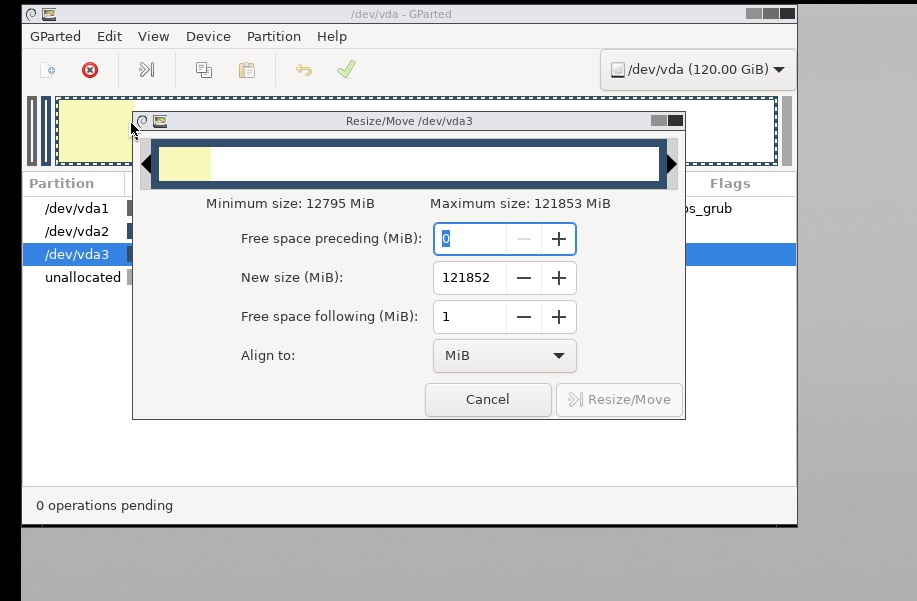
- clear up: now you need to detach the DVD in
Mediaand change your boot order back toHard Driveat first. Then you can restart your server again.
result
If you logged into your system, you can check the new partition is now available:
➜  ~ sudo lsblk
NAME   MAJ:MIN RM  SIZE RO TYPE MOUNTPOINTS
sr0     11:0    1 1024M  0 rom
vda    254:0    0  120G  0 disk
├─vda1 254:1    0    2M  0 part
├─vda2 254:2    0    1G  0 part /boot
└─vda3 254:3    0  119G  0 part /